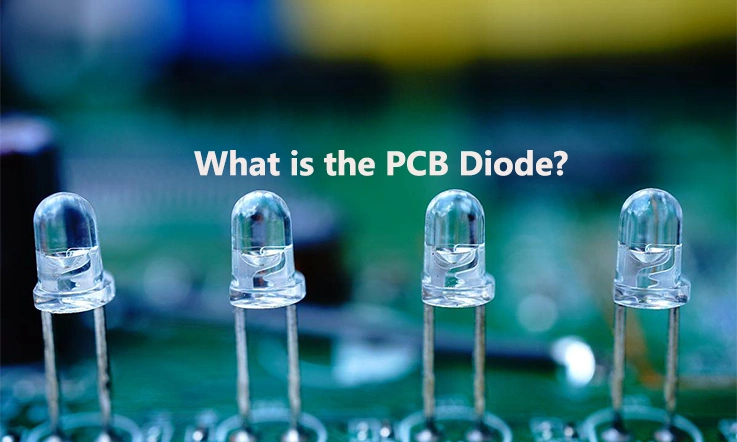
If you’re seeking comprehensive information about circuit board diodes and facing challenges in finding relevant details, you’ve come to the right place. This article aims to address all your queries regarding PCB diodes, providing a thorough overview of their different types, applications, and testing methods. So, without further ado, delve into the following sections to gain a comprehensive understanding of diodes and expand your knowledge in this domain.
What is the PCB Diode?
A PCB diode constitutes a semiconductor device responsible for allowing current to travel solely in one direction. Constructed from materials such as silicon, it comprises two terminals referred to as the anode and the cathode. The anode denotes the positive terminal, whereas the cathode signifies the negative terminal.
Upon applying positive voltage to the anode and negative voltage to the cathode, current will traverse the diode. However, if the voltage polarity is reversed, the diode will block the flow of current due to its inherent electric field. Hence, the diode’s design ensures unidirectional current flow while preventing reverse current passage.
How Many Types of PCB diodes are There?
There are two primary types of PCB diodes: surface mount diodes and through-hole diodes. Surface mount diodes are soldered onto the surface of the PCB, while through-hole diodes are inserted into drilled holes on the PCB. Various types of PCB diodes exist based on their specific functions in a circuit. Here are some notable examples:
Zener diode: Used for voltage control in a circuit, it is placed in series with the load and functions as a short circuit when the applied voltage exceeds its forward voltage drop.
Light-emitting diode (LED): Converts current into an optical signal, producing light when forward current flows through it. LEDs are commonly used in digital displays due to their low power consumption and long lifespan.
Schottky diode: Used to prevent corrosion, particularly in electrolytic solutions. It ensures the capacitance of the dielectric material remains constant in applications such as radio circuits.
Esaki diode: Also known as a tunnel diode, it allows current to flow forward and backward between two points due to the quantum tunneling effect. Esaki diodes are frequently used for voltage regulation.
Switching diode: Designed to interrupt currents without causing damage, these diodes find applications in circuits controlling electric motors and AC-to-DC converters.
Germanium diodes: Ideal for high-voltage and rectifier applications, germanium diodes emit light when forward current flows through them. They are often used for waveform detection, such as radio signals.
Silicon diodes: Suitable for converting AC to DC, silicon diodes rectify high-voltage AC currents, sense AC voltages, and perform frequency conversions in radio circuits.
Tunnel diode: Enables current flow from the anode to the cathode, even with a small forward voltage drop. The forward current of a tunnel diode increases linearly with increasing voltage.
What are the Application Areas of Circuit Board Diodes?
Diodes have various applications in power conversion and electronic circuits. Here are some key uses of PCB diodes:
Power Conversion: Diodes can convert AC power to DC power. By using a single diode or a group of four diodes arranged in a full-wave or half-wave rectifier configuration, household AC power (e.g., 110V) can be converted to DC power. This process eliminates the negative components of the AC waveform and produces a steady DC voltage with minimal ripple.
Signal Demodulation: PCB diodes are commonly employed to remove the negative component of an AC signal. Since the negative portion of the AC waveform often mirrors the positive half, the stripping process retains most of the original information, resulting in improved signal processing. Signal demodulation is commonly used in radios to extract the radio signal successfully.
Logic Gates: Diodes play a crucial role in constructing logic gates for computing binary operations. Logic gates, enabled by diodes, determine whether a switch is in the “off” state (“0”) or the “on” state (“1”). Millions of diodes are employed in modern processors for logical operations.
Voltage Spike Suppression: Diodes are frequently used to protect against potentially damaging voltage spikes. Transient Voltage Suppression (TVS) diodes, similar to Zener diodes, can handle relatively high power ratings and have lower breakdown voltages. These diodes are specifically designed to absorb excess energy when voltages exceed their breakdown voltage.
Current Steering: Diodes are commonly utilized for current steering, ensuring that current flows in the desired direction. The current steering capability of diodes is extensively employed in power switching applications, such as directing power from a power supply to a battery-operated system. For example, a cellphone draws power from the external source when plugged in but switches to using the battery when unplugged.
Reverse Current Protection: Diodes offer protection against reverse current flow. Placing a diode in series with the positive side of a power supply creates a reverse protection diode. This ensures that the power supply applies only positive voltage, allowing current to flow in the intended direction. However, this approach incurs a voltage loss due to the diode’s forward voltage drop. For reverse protection, Schottky diodes are often preferred due to their lower voltage drop.
How to Test PCB Diode?
To verify the terminal orientation of a PCB diode, follow these steps:
Set the multimeter to the diode testing mode by adjusting the central knob to the diode symbol indicated on the meter.
Connect the red probe of the multimeter to the diode’s anode terminal and the black probe to the cathode terminal. This configuration represents the forward-biased state of the diode.
Take note of the voltage reading displayed on the meter. For a silicon diode, the value should be between 0.6 to 0.7 volts, indicating that the diode is functioning correctly. For germanium diodes, the voltage reading should be between 0.25 to 0.3 volts.
Reverse the terminal connections on the meter, so now connect the red probe to the cathode and the black probe to the anode. This represents the reverse-biased state of the diode, where no current should flow through it. The meter should display “OL” (open circuit) if the diode is in good condition.
If the meter provides insignificant readings or deviates from the expected values in either of the above scenarios, it indicates that the diode is defective.
How to Solder Diode on Circuit Board?
Steps 1:
Materials Needed
1. Diode
2. Circuit board
3. Soldering iron
4. Solder
5. Wire cutters
6. Flux (optional)
7. Heat sink (optional)
8. Safety goggles
Steps 2:
1. Prepare Your Workstation: Make sure your workstation is clean and well-lit. You should have all the necessary tools at hand.
2. Safety First: Always wear safety goggles to protect your eyes from any spitting solder or flux.
3. Identify Diode Orientation: Diodes have a polarity, which means they need to be soldered in a specific direction. The diode will have a band on one end, which corresponds to the cathode (negative side). The other side without the band is the anode (positive side). Your circuit board should have a matching symbol that shows you which way the diode should be oriented.
4. Insert the Diode: Place the diode into the correct holes on the circuit board, making sure the cathode and anode are correctly aligned with the markings on the board.
5. Bend the Leads: Bend the leads of the diode at a 45-degree angle against the bottom of the circuit board. This will hold the diode in place while you solder it.
6. Apply Heat: Heat up the soldering iron. Once it’s hot, touch the tip of the soldering iron to one of the diode’s leads and the corresponding circuit board pad at the same time. This will heat up both the lead and the pad.
7. Apply Solder: Touch the end of the solder to the junction of the soldering iron, the pad, and the diode lead. The heat should melt the solder, which will then flow around the lead and the pad. Remove the solder, but keep the soldering iron in place for another second or two to allow the solder to flow evenly. Then, remove the soldering iron.
8. Repeat: Repeat this process for the other lead of the diode.
9. Trim the Leads: Once the solder has cooled and solidified, use the wire cutters to trim off the excess length of the diode’s leads. Be careful not to cut into the solder joint itself.
10. Check Your Work: Inspect the solder joints. They should be shiny and smooth, with the solder forming a volcano or cone shape. If the joint looks dull, cracked, or blob-like, you may need to reheat it and apply more solder.
Remember, practice makes perfect! If you’re new to soldering, it might be a good idea to practice on some scrap components and circuit boards first, before working on your actual project.
Remember, safety first. Always work in a well-ventilated area to avoid inhaling fumes from the solder, and never touch the tip of the soldering iron while it’s hot.
How to Replace a PCB Diode?
When replacing a damaged diode on a designed PCB, follow these steps:
● Power off the PCB by disconnecting it from the main power supply to ensure safety during the repair process.
● Identify the faulty diode on the PCB by visually inspecting the components and locating the diode that requires replacement.
● Determine the best method to remove the diode from the PCB. This may involve heating the soldering iron and carefully positioning it around the leads of the diode.
● Apply heat to the diode’s leads, causing the solder to melt. Use a solder sucker tool to remove the molten solder from the joints. Alternatively, a solder wick can be used to absorb and remove any remaining solder, ensuring clean removal of the damaged diode.
● Select a suitable replacement diode that meets the necessary specifications, such as voltage and current ratings. Confirm the compatibility of the selected diode using a diode testing procedure, ensuring it functions correctly.
● Place the replacement diode in the correct orientation on the PCB, aligning it with the diode’s markings, such as the cathode stripe or other indicators. Carefully solder the diode to the PCB by applying heat to the leads and soldering them to the corresponding pads, ensuring proper connections without causing damage to other components.
● Conduct a visual inspection of the soldering joints to verify their quality. Additionally, a microscopic view can be used for closer inspection, ensuring the correct soldering of the diode leads. The soldering process should generally follow industry standards, such as the IPC-A-610 criteria, for reliable and high-quality solder connections.
Why Should Use PCB Diodes?
A PCB diode is an electronic component that allows current to flow in one direction while blocking it in the opposite direction. Initially, diodes were made using heated wires inside a metal chamber within a glass vacuum tube. However, modern diodes are predominantly semiconductor diodes, typically composed of doped silicon.
The most common application of PCB diodes is rectifying AC power into DC power. Various rectifier circuits, such as half-wave, full-wave center tapped, and full bridge rectifiers, can be constructed using diodes. These circuits are essential in electronic power supplies, such as laptop chargers, where AC current from the mains power supply needs to be fully converted to DC current for storage.
Diodes are also utilized for protecting sensitive electronic devices from voltage surges. When employed as voltage protection devices, diodes remain non-conducting under normal circumstances. However, they quickly conduct and divert high-voltage spikes to ground, preventing them from damaging delicate integrated circuits. Specifically designed diodes called “transient voltage suppressors” are used for this purpose. These diodes can handle significant power surges within short time periods that would otherwise harm sensitive components.
It should be noted that current flows only in the positive direction through diodes. Nonetheless, the use of a reverse protection diode comes with a drawback. It often results in some voltage loss due to the forward voltage drop. Therefore, Schottky diodes are a preferred choice when it comes to reverse protection diodes, as they exhibit lower forward voltage drops compared to traditional diodes.
Conclusion
PCB diodes are commonly employed in circuit protection due to their ability to restrict electrical current to flow in only one direction. This characteristic is valuable as certain electrical components and devices can be damaged or malfunction if current flows in the wrong direction. Each type of PCB diode has its own distinctive operating principle and application. The inclusion of diodes is indispensable in PCB design as these components play a significant role in the proper functioning of the circuitry.
When it comes to PCB manufacturing and various PCBA services, JarnisTech stands out as an excellent choice. We offer a wide range of professional services and possess the expertise and advanced machinery to fulfill diverse requirements. Request a quote from us today! If you have additional insights or information regarding PCB diodes, please feel free to contact us!

