Mechanical keyboards offer a range of advantages over traditional keyboards, making them highly favored by many users. These keyboards are known for their exceptional tactile feedback, enhanced durability, and increased versatility. These benefits can be attributed, in part, to the utilization of printed circuit boards (PCBs) as the central components that connect various elements of the keyboard, including key switches, LEDs, diodes, and microcontrollers.
For keyboard enthusiasts, the process of designing a custom mechanical keyboard is an engaging and rewarding experience. By customizing the layout of the keyboard PCB to match individual preferences, one can create a unique and personalized keyboard that aligns with their specific needs and aesthetic preferences. In this informative article, Jarnis Technology will provide a comprehensive tutorial on the manufacturing process of mechanical keyboards, beginning with the essential steps involved in designing the PCB.
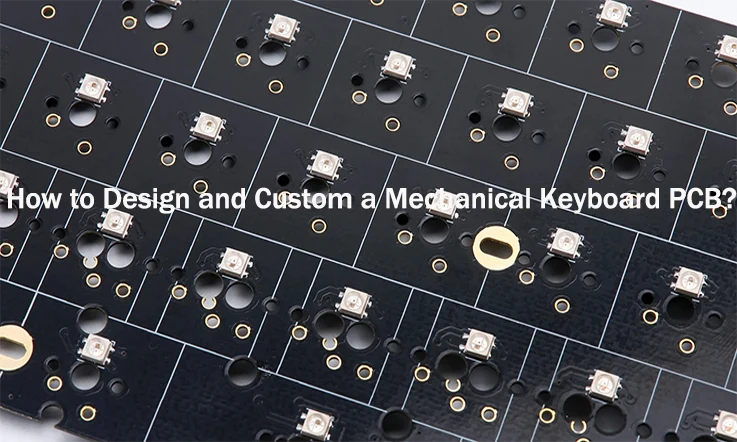
What is Mechanical Keyboard PCB?
A Mechanical Keyboard PCB (Printed Circuit Board) refers to the electronic component that serves as the foundation or backbone of a mechanical keyboard. It is a flat board made of insulating material, typically fiberglass, with a series of conductive pathways etched or printed onto its surface. The PCB acts as a platform for mounting and connecting various components of the keyboard, including switches, diodes, LEDs, and the controller.
The primary function of a mechanical keyboard PCB is to facilitate the electrical connections between the key switches and the keyboard’s controller. Each switch on the mechanical keyboard is soldered onto the PCB, and the conductive traces on the board carry the electrical signals from the switches to the controller. The PCB also provides a means for the controller to communicate with the computer or device it is connected to.
Additionally, the mechanical keyboard PCB may incorporate other features such as backlighting support, programmability, and various layout options. It plays a crucial role in determining the overall functionality, compatibility, and customization possibilities of the mechanical keyboard.
As a result, a mechanical keyboard PCB is the circuit board that enables the electrical connections between the switches and the controller, allowing for the input of keystrokes and the transmission of data to the computer or device.
Mechanical Keyboard PCB Design Features and Considerations
Mechanical keyboard PCB design involves the process of creating and optimizing the layout and circuitry of the PCB specifically tailored for a mechanical keyboard. Here are some key aspects and considerations involved in mechanical keyboard PCB design:
Key Layout and Matrix: Designing the PCB layout starts with determining the key matrix, which defines the arrangement and organization of the switches on the board. The matrix layout affects the electrical connections and determines the key rollover capabilities of the keyboard.
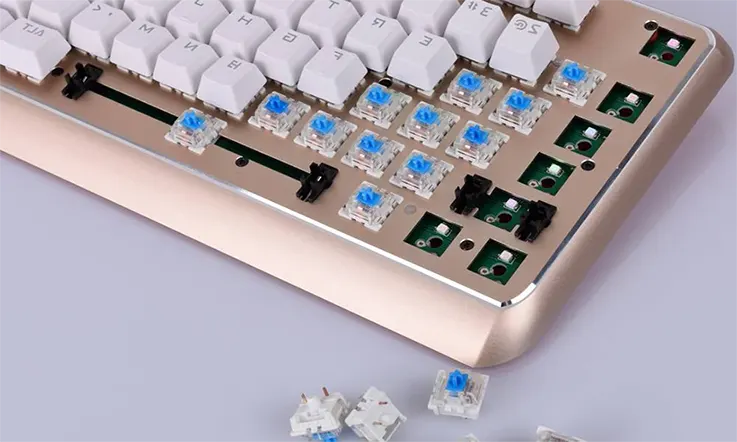
Switch Compatibility and Soldering: The PCB design should be compatible with the specific switches intended for use in the mechanical keyboard. This includes ensuring the correct footprint and pin layout for the switches. Proper soldering pads or through-hole vias must be designed to securely mount and solder each switch onto the PCB.
PCB Size and Form Factor: The physical dimensions and form factor of the PCB are crucial considerations in mechanical keyboard design. The PCB size should align with the desired keyboard size, whether it’s a full-size, tenkeyless (TKL), compact, or custom form factor.
Traces and Signal Routing: The PCB traces are the conductive pathways that carry electrical signals between the switches and the controller. Proper signal routing is essential to minimize electrical interference and ensure reliable key detection. Techniques such as trace width optimization, signal isolation, and ground plane design may be employed to enhance signal integrity.
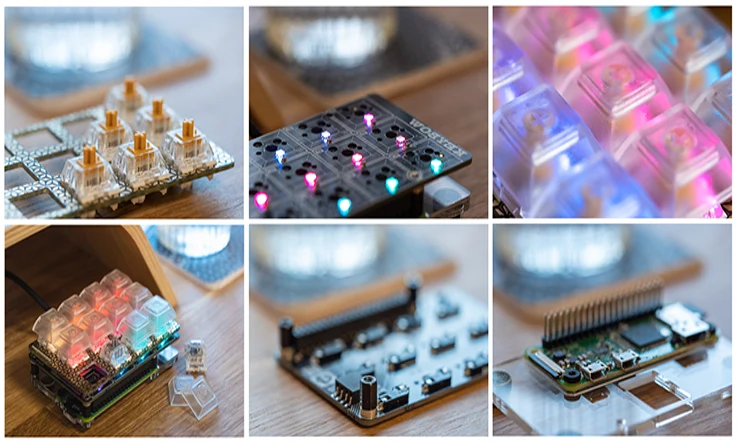
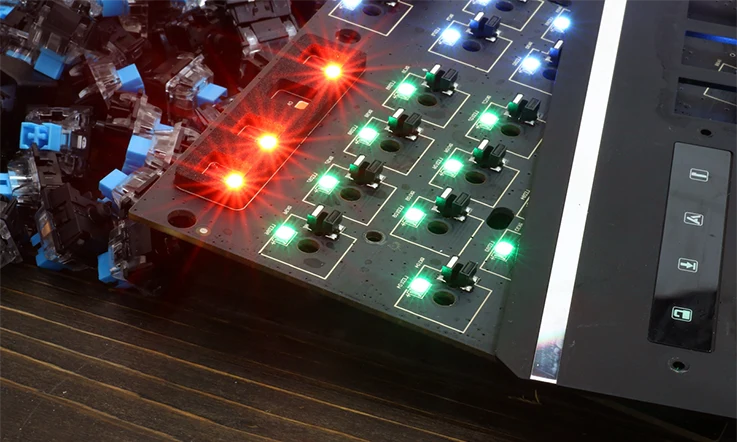
PCB Features and Components: The PCB design may incorporate additional features, such as backlighting support for RGB LEDs or single-color LEDs. These features require appropriate circuitry and components on the PCB to control and power the lighting elements. Other components like diodes, resistors, and capacitors may also be included to support keyboard functionality.
USB Connectivity and Controller Options: The PCB design should include USB connectivity to establish a connection with the computer or device. The choice of the controller chip and its integration on the PCB is crucial for keyboard functionality, programmability, and firmware support.
Mounting and Stabilizer Support: The PCB design should consider the mounting mechanism for the PCB within the keyboard case. It should provide appropriate mounting holes or standoffs to secure the PCB. Additionally, if the keyboard uses stabilizers for larger keys, the PCB design should accommodate the stabilizer mechanism.
ESD Protection and EMI Considerations: Electrostatic discharge (ESD) protection measures and electromagnetic interference (EMI) considerations should be incorporated into the PCB design to ensure the keyboard’s reliability and compliance with regulatory standards.
Prototyping and Testing: Once the PCB design is complete, it is typically prototyped and tested to verify its functionality, key detection, and stability. Iterative testing and refinement may be necessary to address any issues or optimize the design further.
It’s worth noting that mechanical keyboard PCB design can range from simple DIY designs to complex custom designs, depending on the desired features, level of customization, and intended use of the keyboard.
What to do Before Designing a Mechanical keyboard PCB?
Budget
When embarking on a project, it is crucial to give careful consideration to the budgetary aspects, as they significantly influence the selection of components and the overall complexity of the design. As a distinguished PCBA company, JarnisTech offers valuable guidelines for effectively budgeting your project:
Establish a comprehensive budget: Commence the project by setting a realistic and well-defined budget, taking into account the anticipated costs associated with components and customization options. This initial step ensures that financial resources are allocated appropriately throughout the project lifecycle.
Conduct thorough research on component costs: Undertake extensive research to ascertain the costs of various components required for your project. It is advisable to explore reputable deals sites and avail yourself of any available discounts or promotions. By doing so, you can effectively manage expenses and potentially realize cost savings. JarnisTech provides exceptional component procurement services, guaranteeing the acquisition of genuine products at competitive prices.
Determine component priorities: Evaluate the functionalities of the components involved, differentiating between essential and optional features. This assessment allows you to prioritize the PCB design and allocate resources accordingly. For instance, if tactile feedback is a primary concern, it is prudent to invest more in high-quality key switches to enhance the overall user experience.
By adhering to these professional tips, you can ensure a meticulous budgeting process for your project, enabling you to make informed decisions regarding component selection and design complexity. JarnisTech stands ready to support you with our expertise in PCBA services, facilitating the successful realization of your project objectives while optimizing cost-efficiency.
Tools and Materials
Prior to commencing the process of custom keyboard PCB design, it is imperative to ensure that you possess the essential tools and materials. These encompass:
PCB design software: Utilize industry-standard tools such as Eagle, KiCad, or Altium to facilitate the creation of your custom keyboard PCB design.
Computer with USB port: Ensure that your computer is equipped with a functional USB port to establish connectivity with the custom keyboard PCB.
Microcontroller: Select a suitable microcontroller for your custom keyboard PCB, such as Atmega32u4 or STM32, which will serve as the central processing unit for the keyboard’s functionality.
Key switches: Acquire the desired key switches for your custom keyboard, such as Cherry MX or Kailh switches, which determine the tactile feel and responsiveness of the keys.
Diodes: Obtain an adequate number of diodes, with one diode required for each key switch. Diodes are necessary to prevent ghosting or key matrix issues.
Resistors: If your custom keyboard design incorporates LEDs, procure resistors to appropriately control the current flow to the LEDs, ensuring optimal performance and longevity.
Capacitor: Include a capacitor in your custom keyboard PCB design to stabilize the power supply, minimizing voltage fluctuations and potential interference.
LEDs: If your design incorporates backlighting or indicator lights, acquire suitable LEDs to fulfill the desired lighting requirements.
Soldering iron and solder: Possess a reliable soldering iron and high-quality solder to securely and effectively join the components and connections on the custom keyboard PCB.
Multimeter: Employ a multimeter, a versatile testing instrument, to assess the continuity and integrity of connections, enabling you to identify and rectify any potential issues.
By ensuring the availability of these tools and materials, you will be adequately equipped to embark on the custom keyboard PCB design process, thereby facilitating a smooth and successful implementation of your design vision.
How to Choosing the Right Mechanical Keyboard Components ?
Microcontroller Selection
When determining the requirements for your keyboard, there are several factors to consider in selecting an appropriate microcontroller:
Number of Keys: It is essential to determine the number of keys your keyboard will have. This information is crucial for ensuring that the microcontroller you choose has an adequate number of input/output (I/O) pins to connect all the keys effectively.
Communication Protocol: Verify that the microcontroller supports the desired communication protocol, such as USB or Bluetooth, which you intend to use for connecting the keyboard to the computer or other devices. This compatibility ensures seamless integration and reliable data transmission.
Processing Power: Evaluate the processing power of the microcontroller to ensure it can handle the specific features you plan to incorporate into your keyboard, such as RGB lighting effects or a display. Sufficient processing capabilities will enable these features to function smoothly without compromising the overall performance of the keyboard.
Availability and Cost: Choose a microcontroller that is readily available in the market and fits within your budget. Popular microcontrollers for mechanical keyboards include the Atmel AVR, PIC, and STM32 series. By opting for commonly used microcontrollers, you can benefit from the availability of resources, support, and cost-effective options.
Community Support: Consider selecting a microcontroller that has an active community of developers and users. This aspect contributes to a thriving ecosystem where you can find ample resources, documentation, and assistance with programming and troubleshooting. The presence of a supportive community greatly simplifies development and enhances the overall experience of working with the microcontroller.
By carefully considering these factors, you can choose a suitable microcontroller for your keyboard project that meets your requirements in terms of key count, communication protocol, processing power, availability, cost, and community support.
Key Switch Selection
Keyswitches are mechanical switches specifically designed to register keystrokes. Each type of keyswitch possesses unique characteristics that should be considered when making a selection. Key factors to focus on include tactile feedback, actuation force, and noise level. Presented below are four distinct types of keys:
Linear: Linear keys offer a seamless keystroke experience devoid of noticeable tactile bumps or audible feedback. These keys require lighter keystrokes to activate and are exemplified by switches like the Cherry MX Red.
Tactile: Tactile keys are characterized by a discernible bump when engaged, providing a clear tactile feedback sensation. They necessitate a specific degree of key force to activate, making them well-suited for precise typing. An example of a tactile keyswitch is the Cherry MX Brown.
Clicky: Clicky keys feature both tactile bumps and audible clicks, delivering physical and auditory feedback upon activation. These switches are known for their distinct click sound and tactile response. The Cherry MX Blue is a prominent example of a clicky keyswitch.
Silent: Silent keys incorporate noise suppression design elements to offer a quieter typing experience. These switches are engineered to minimize the noise generated during keystrokes while maintaining functionality. The Cherry MX Silent Red is an excellent illustration of a silent keyswitch.
When making a decision, it is important to consider the desired tactile feedback, actuation force, and noise level to ensure an optimal typing experience that aligns with individual preferences.
Diode-resistor-capacitor Selection
Diodes play a pivotal role in ensuring the optimal functionality of a mechanical keyboard PCB. They serve to prevent undesirable issues such as ghosting and key chatter by guaranteeing that only one keystroke is registered at a given time. Therefore, it is crucial to select the appropriate diodes in order to maintain compatibility with the PCB layout and key switches employed. Among the popular diode options available, the 1N4148 and 1N4148W stand out.
While not indispensable, the inclusion of resistors and capacitors can greatly contribute to the stability of the power supply and the reduction of noise in the keyboard PCB. Moreover, if the intention is to incorporate LEDs into the keyboard, resistors become essential to regulate the current flow through the LEDs and prevent any undesirable consequences.
LED Selection
LEDs have gained popularity as a sought-after addition to custom keyboards due to their ability to enhance the visual appeal and provide visual feedback. These LEDs can be utilized to backlight specific keys or introduce RGB lighting to the entire keyboard, offering a vibrant and customizable lighting experience. However, when selecting LEDs for such purposes, careful consideration of their power consumption becomes crucial.
It is noteworthy that RGB LEDs typically consume more power compared to their monochromatic counterparts. Consequently, it is advisable to choose LEDs that consume a reasonable amount of power to ensure the stable functioning of the power supply. This precautionary measure helps prevent any potential issues that may arise from power supply instability, thus ensuring a reliable and uninterrupted operation of the keyboard’s lighting system.
How to Make a Custom keyboard PCB?
Making a custom keyboard PCB (Printed Circuit Board) requires some knowledge of electronics and PCB design. Here are the general steps involved in creating a custom keyboard PCB:
Research and Planning
Determine the size and layout of your custom keyboard. Decide on the number and arrangement of keys, as well as any additional features like backlighting or programmability.
Research existing keyboard PCB designs and layouts to get an idea of what’s possible and to gather inspiration.
Schematic Design
Create a schematic diagram of your keyboard PCB using electronic design software like KiCad, Eagle, or Altium Designer.
Place the key switches, diodes (if using a matrix layout), microcontroller, and other components on the schematic.
Connect the components together, ensuring proper electrical connections.
PCB Layout Design
Once the schematic is complete, transfer the components to the PCB layout view in your design software.
Position the components on the PCB, taking care to consider key placement, switch spacing, and any additional features.
Route the electrical traces between the components, ensuring proper connections and avoiding any interference or short circuits.
Pay attention to signal integrity, ground planes, and power distribution.
Design Rule Check (DRC)
Run a Design Rule Check in your PCB design software to verify that your design meets the manufacturing requirements and constraints.
Fix any errors or warnings identified by the DRC to ensure the PCB is manufacturable.
Output Generation
Generate the necessary output files for manufacturing the PCB, such as Gerber files, drill files, and any additional manufacturing files required by your chosen PCB manufacturer.
Prototype Manufacturing
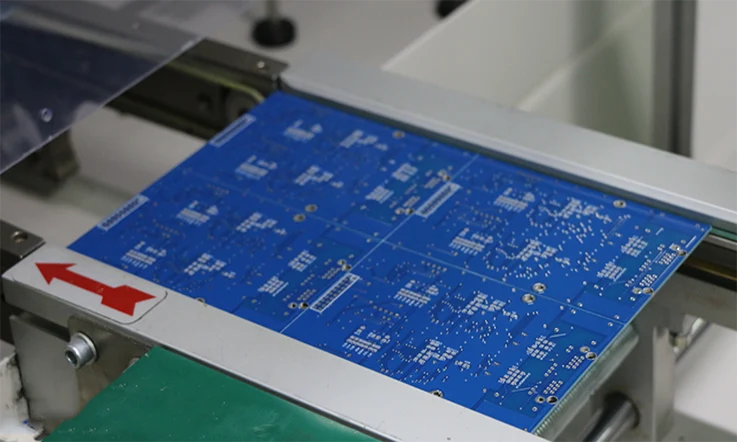
Send the generated files to a PCB manufacturer or fabricate the PCB yourself if you have the necessary equipment.
Choose a manufacturer that suits your requirements in terms of quality, cost, and turnaround time.
Review and approve the manufacturer’s design for manufacturing (DFM) feedback if provided.
Assembly and Testing
Once you receive the manufactured PCB, source the necessary components like key switches, diodes, microcontroller, and other electronic parts.
Solder the components onto the PCB following proper soldering techniques.
Connect the keyboard PCB to a computer and test the functionality of each key, ensuring proper electrical connections and programming if applicable.
Note: Designing a custom keyboard PCB requires knowledge of electronics, PCB design software, and soldering techniques. It’s recommended to have prior experience or seek guidance from knowledgeable individuals or communities specializing in keyboard design.
How to DIY a mechanical keyboard ?
Building a mechanical keyboard yourself can be a rewarding DIY project. Here’s a general guide to help you get started:
1. Gather Components:
Mechanical switches: Choose the type of switches you prefer, such as Cherry MX, Gateron, Kailh, etc. Consider factors like tactile feedback, actuation force, and noise level.
Keycaps: Select keycaps that fit your chosen switches. There are various materials, profiles, and designs available.
PCB (Printed Circuit Board): You can either design and manufacture a custom PCB as discussed in the previous response or purchase a pre-made PCB that fits your desired layout.
Controller: Obtain a microcontroller or controller board that will serve as the brain of your keyboard. Popular choices include Arduino Pro Micro, Teensy, or custom-designed PCBs with integrated controllers.
Stabilizers: If your keyboard layout includes larger keys like spacebar or shift keys, you’ll need stabilizers to ensure smooth key movement. Cherry-style or screw-in stabilizers are commonly used.
Case: Decide whether you want a custom-made case or if you’ll repurpose an existing keyboard case. Consider factors like material, design, and compatibility with your chosen components.
Other components: You may need soldering equipment (soldering iron, solder wire), wire, diodes (if not integrated into the PCB), and mounting screws.
2. Prepare the PCB:
If you’re using a pre-made PCB, ensure it’s compatible with your chosen switches and key layout.
If you’re designing your own PCB, follow the steps outlined in the previous response to create the schematic, PCB layout, and generate manufacturing files.
If necessary, solder any additional components like diodes onto the PCB.
3. Soldering:
Place the switches into their designated positions on the PCB.
Heat up your soldering iron and apply a small amount of solder to the tip.
Heat the switch’s solder pad and the corresponding pin, and then apply solder to create a secure connection.
Repeat this process for all the switches on the PCB.
If your PCB has through-hole components like LEDs or resistors, solder them as well.
4. Install Stabilizers:
If your keyboard layout includes larger keys, you’ll need to install stabilizers for smooth key movement.
Insert the stabilizers into the designated positions on the PCB or case.
Attach the stabilizer wire to the stabilized keys (spacebar, shift keys) as per the manufacturer’s instructions.
5. Mount the PCB:
Place the PCB into the case, ensuring it fits securely and aligns with the mounting holes.
Use the provided mounting screws or other fastening methods to secure the PCB to the case.
6. Install Keycaps:
Take your chosen keycaps and press them firmly onto the switches, ensuring they are aligned and seated properly.
7. Testing:
Connect the keyboard to a computer using a USB cable.
Test each key to verify that it registers correctly.
f necessary, program the keyboard’s firmware using software like QMK or VIA to customize key mappings, lighting effects, and other features.
8. Final Assembly:
Once you’re satisfied with the functionality and aesthetics, reassemble the case if it was disassembled during the process.
Double-check all connections and ensure everything is securely in place.
That’s it! You have successfully DIYed your mechanical keyboard. Enjoy typing on your custom creation!
Why Choose JarnisTech for Your Mechanical Keyboard PCB ?
If you are seeking a reputable supplier for professional mechanical keyboard PCBs in China, JarnisTech is the optimal choice for you. Equipped with a sizable workshop housing more than 500 skilled workers, we boast a substantial monthly production capacity of 40,000 square meters.
At JarnisTech, our production department operates on two to three shifts, ensuring that even during peak seasons, your delivery timeline remains unaffected. We prioritize maintaining prompt delivery schedules to meet your requirements.
As a trusted mechanical keyboard PCB supplier, JarnisTech prides itself on an engineering team with over 20 years of design experience. Our expertise has been leveraged by a diverse clientele of 3000+ customers worldwide, spanning countries such as the USA, Canada, Germany, UK, Spain, Italy, Sweden, Norway, and more.
When you embark on designing a new mechanical keyboard and require a prototype PCB within a tight 24-hour timeframe, JarnisTech is well-equipped to assist you promptly.
Rest assured that our sales team is attuned to your working hours, enabling them to promptly respond to your emails or inquiries, eliminating concerns regarding time differences.
Once you are prepared to proceed with your mechanical keyboard PCB order, kindly forward your CAD file or Gerber file to us. Our proficient engineering team will meticulously review the files prior to commencing manufacturing.
We encourage you to submit your quote to us without delay, and we assure you that we will promptly furnish you with a comprehensive quotation.
In Conclusion
Mechanical Keyboard PCBs play a crucial role in the performance and functionality of mechanical keyboards. Their design, compatibility, and quality are essential factors that directly impact the overall user experience. As technology continues to evolve, we can expect further innovation and customization options in the realm of Mechanical Keyboard PCBs. Whether you’re a casual user or an avid keyboard enthusiast, understanding the intricacies of PCBs in mechanical keyboards can help you make informed decisions when selecting or designing your own keyboard.
Related Posts:
1. Computer PCB